This page contains affiliate links. If you purchase through them we may earn a small commission at no extra cost to you. Learn more
Solar for Campervans, Motorhomes and Camping: A Complete Guide
Solar is one of the most practical upgrades you can make to a campervan or motorhome. Once installed, it generates free electricity from the sun — no hookup fees, no generator noise, no need to stay on campsites with electrical points. For wild camping and longer trips, it changes everything.
This guide covers how to size and spec a system for a van, motorhome, or camping setup — from panels and charge controllers to batteries and wiring.
Do You Need a Fixed or Portable Setup?
Before sizing panels and batteries, decide whether you want a permanent installed system or a portable one.
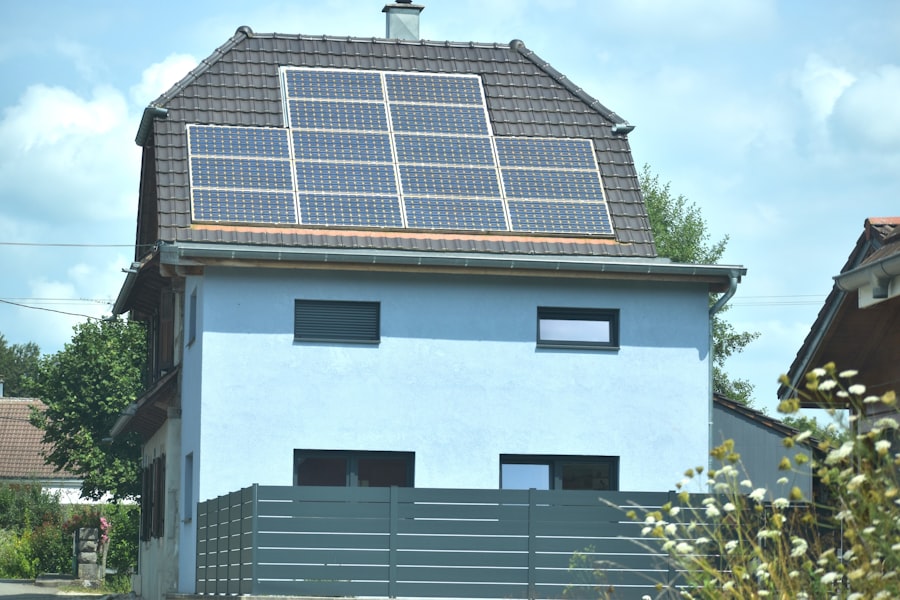
Fixed roof-mounted panels are ideal for full-time vanlifers, motorhome owners, and anyone doing extended trips. Panels stay on the vehicle, wiring is tidy, and you get consistent generation without setup effort at each stop.
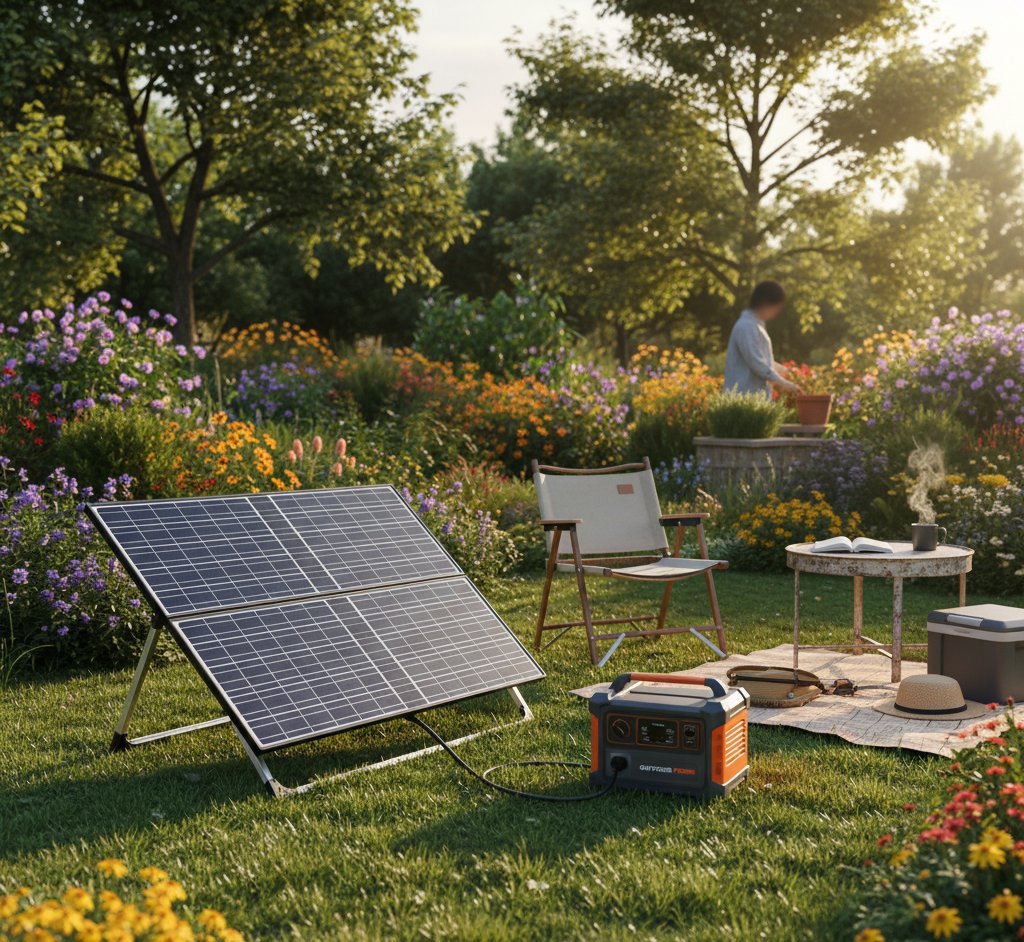
Portable panels and power stations suit occasional campers, festival-goers, and people who want solar without drilling holes in their vehicle. You can take them camping, use them at home, and charge them on hookup overnight. No installation required.
For occasional camping, a portable power station like the EcoFlow DELTA or RIVER range paired with a folding solar panel is often the most practical solution — no wiring, no permanent installation, and you can use it at home too.
Sizing Your System
Step 1: Work Out Your Daily Power Needs
List everything you want to run and estimate how many hours per day:
| Load | Typical Watts | Hours/Day | Wh/Day |
|---|---|---|---|
| 12V compressor fridge | 40W average | 24 | ~960 |
| LED lighting (4 strips) | 20W total | 4 | 80 |
| Phone charging (2 phones) | 10W | 2 | 20 |
| Laptop | 65W | 3 | 195 |
| Water pump | 100W | 0.2 | 20 |
| 12V fan | 25W | 4 | 100 |
| Total | ~1,375 Wh/day |
This example represents a moderately loaded campervan. A basic setup (fridge, lights, phones) might be 500–700 Wh/day. A heavily loaded system with CPAP, multiple devices, and an inverter for 240V appliances could be 2,000+ Wh/day.
Step 2: Account for Solar Generation
In the UK, a solar panel generates roughly 3–4 peak sun hours per day on average (more in summer, less in winter). A 200W panel generates:
- Summer: 200W × 5 hours = ~1,000 Wh/day
- Spring/Autumn: 200W × 3.5 hours = ~700 Wh/day
- Winter: 200W × 2 hours = ~400 Wh/day (and often less due to lower sun angle and clouds)
Panels on a van roof are often not perfectly oriented — a flat-mounted 200W panel in summer might realistically generate 700–800 Wh/day.
Typical System Sizes
| Use Case | Solar | Battery | What It Covers |
|---|---|---|---|
| Weekend camper, basic loads | 100W | 50Ah LiFePO4 | Lighting, phones, 12V fridge |
| Full-time vanlife, moderate | 200W | 100Ah LiFePO4 | Above + laptop, fan |
| Full-time, heavy loads | 400W | 200Ah LiFePO4 | Above + CPAP, occasional 240V use |
| Motorhome, high comfort | 600W+ | 300Ah+ LiFePO4 | Air heating, large fridge, work setup |
Winter Camping: Don't Over-Rely on Solar
In the UK in December and January, a roof-mounted 200W panel might only generate 200–400 Wh on a cloudy day. If you're winter camping or living in a van full-time through winter, plan for shore power top-ups or a DC-DC charger from the vehicle alternator. Solar alone is often insufficient November through February.
Panel Types for Vans and Motorhomes
Rigid Monocrystalline Panels
The standard choice for roof-mounted installations. High efficiency (20–22%), durable, and the cheapest per watt. The downside: they're rigid and need proper mounting frames. For a flat van roof, they work well; for a curved motorhome roof, flexible panels may be easier to install.
Typical cost: £80–£150 for a 200W panel.
Flexible Solar Panels
Thin, lightweight panels that can conform to curved surfaces. Popular for motorhomes with curved roofs. The trade-offs: lower efficiency, shorter lifespan (5–10 years vs 20+ for rigid), and they must be glued rather than mounted — heat builds up underneath, which can degrade the adhesive over time.
Typical cost: £100–£200 for a 200W flexible panel.
Flexible Panel Longevity
Flexible panels mounted directly to a metal roof with no air gap run hot, which degrades them faster. If using flexible panels, leave a small air gap or use standoffs where possible. Expect 5–8 years of good performance rather than the 20+ years of a rigid panel.
Portable Folding Panels
Foldable panels with carry handles, designed for placing on the ground or angling toward the sun. Perfect for camping rather than van installations. You can orient them optimally throughout the day, often generating more than a fixed roof panel.
Typical cost: £80–£200 for a 100–200W folding panel.
Charge Controllers: PWM vs MPPT
A charge controller sits between the solar panels and the battery, regulating charging to protect the battery from overcharging. There are two types:
PWM (Pulse Width Modulation)
PWM controllers are simple and cheap. They work by directly connecting the panel to the battery and reducing the connection duration as the battery fills. The downside: they force the panel to operate at battery voltage, not panel voltage. If your 200W panel has a Vmp (voltage at maximum power) of 36V but your 12V battery is at 12.5V, the panel is effectively clipped — you're wasting a significant portion of its potential.
PWM controllers make sense only for small systems (under 50W) where cost is the primary concern.
Typical cost: £15–£40.
MPPT (Maximum Power Point Tracking)
MPPT controllers continuously find the panel's optimum operating point (where it generates maximum power) and convert that to the correct voltage for the battery. This can recover 20–30% more energy from the same panel compared to PWM.
For any system over 100W, MPPT pays for itself quickly. A quality MPPT controller from Victron, Renogy, or EPever costs £50–£150 and will outperform a cheap PWM controller significantly.
Typical cost: £50–£200.
Victron MPPT: The Van Life Gold Standard
Victron's SmartSolar MPPT range is widely considered the best in class for mobile applications. Their Bluetooth monitoring via the VictronConnect app is excellent, and the controllers are robust enough for the vibration of van life. Their 75/15 model (for 15A/200W systems) costs around £60–80 and is worth every penny over budget alternatives.
Battery Choices: LiFePO4 vs AGM
AGM (Absorbed Glass Mat) Lead-Acid
AGM batteries are the traditional choice for leisure vehicles. They're cheaper upfront, widely available, and don't require a BMS (battery management system).
The downsides are significant for van life:
- Usable capacity: Only 50% of rated capacity should be used regularly. A 100Ah AGM gives you 50Ah usable.
- Lifespan: 200–400 charge cycles if discharged to 50% regularly. That's 1–2 years of daily use.
- Weight: A 100Ah AGM weighs 25–30 kg.
- Charging: Needs specific charging voltages (bulk/absorption/float) and doesn't like partial charging.
Typical cost: £80–£150 for 100Ah AGM.
LiFePO4 (Lithium Iron Phosphate)
LiFePO4 batteries have transformed van builds in recent years. They're more expensive upfront but significantly better in almost every way:
- Usable capacity: 80–90% of rated capacity. A 100Ah LiFePO4 gives you 80–90Ah usable.
- Lifespan: 2,000–4,000 cycles. That's 5–10+ years of daily use.
- Weight: A 100Ah LiFePO4 weighs 10–13 kg — roughly half the weight of AGM.
- Charging: Accepts fast charging, fine with partial states of charge, no memory effect.
- Safety: LiFePO4 is the safest lithium chemistry — doesn't catch fire or explode if damaged.
For LiFePO4 cells, Fogstar is a well-regarded UK supplier stocking quality cells and complete batteries including their Drift and Robust ranges. Their cells are popular in the van life community for DIY battery builds.
Typical cost: £150–£300 for a 100Ah LiFePO4 battery; £200–£450 for 200Ah.
Wiring Basics
Van electrical systems run on 12V DC. Key principles:
Cable Sizing
Undersized cables get hot, waste energy, and are a fire risk. Use a cable sizing calculator or this rule of thumb:
| Current (Amps) | Minimum Cable Size | Typical Use |
|---|---|---|
| Up to 20A | 4mm² | Charge controller to battery |
| 20–40A | 6mm² | Main battery connections |
| 40–80A | 10mm² | Inverter connections |
| 80–120A | 16mm² | Large inverter, alternator |
Always fuse as close to the battery as possible. A short circuit in unfused wiring can cause a fire.
Fusing
Every circuit needs a fuse or circuit breaker rated for the wire, not the load. If you're using 6mm² cable (rated to ~40A), the fuse should be 40A or less.
Battery Isolator / Master Switch
Install a master isolator switch between the battery and the rest of the system. Essential for maintenance, emergencies, and when the van is in storage.
DC-DC Charger
A DC-DC (B2B) charger lets you charge your leisure battery from the vehicle's alternator while driving. Essential if you're doing winter trips or spending nights in locations with poor solar. Victron Orion-Tr Smart and Renogy range are popular choices. These replace older split-charge relays and work properly with modern smart alternators.
Portable Power Station Option
For occasional camping, a portable power station is often simpler than building a full van electrical system. Products like the EcoFlow DELTA 2 combine battery, inverter, BMS, and AC/DC outputs in one unit. Pair with a 200W folding solar panel and you have a complete off-grid power system with no wiring, no installation, and full portability.
The EcoFlow DELTA 2 has 1,024 Wh of capacity, 1,200W AC output, and charges from solar at up to 500W. It's substantial enough for most camping trips and can double as a home emergency power supply.
Power Stations vs Fixed Installs: Know the Trade-Offs
Portable power stations are more expensive per kWh of capacity than a DIY battery build, and they can't be charged from a vehicle alternator while driving (without an additional adapter). For full-time van life, a proper fixed install is usually better value long-term. For weekend campers and those who want flexibility, a portable station is hard to beat for convenience.
A Practical Starter System
For someone converting a van or adding solar to a motorhome for the first time:
| Component | Specification | Approx Cost |
|---|---|---|
| 2× monocrystalline panels | 200W each (400W total) | £180–£280 |
| MPPT charge controller | Victron SmartSolar 100/30 | £100–£130 |
| LiFePO4 battery | 100Ah 12V with BMS | £200–£300 |
| Cable, fuses, connectors | Various | £50–£100 |
| Mounting brackets | Adjustable roof mounts | £40–£80 |
| Total | £570–£890 |
This system will comfortably run a 12V compressor fridge, lighting, phone and laptop charging, and a 12V fan throughout spring, summer, and autumn in the UK.
Getting Help and Going Deeper
The UK van conversion community is active and knowledgeable. The Victron Community forum, DIY Solar Power Forum, and UK-specific Facebook groups like "Campervan Conversion UK" are excellent resources for system design help and real-world experience.
For LFP cells and complete batteries, Fogstar ships to UK customers and has good support documentation. Their Drift LiFePO4 batteries are popular for van builds due to their compact form factor and quality BMS.
Share this article
OVO has carefully selected trusted teams across the UK to install solar panels and heat pumps. Enjoy the personal touch of a local expert with the peace of mind of a household name.
Affiliate link — we may earn a small commission at no extra cost to you
Stay informed
Get free solar updates direct to your inbox
Related reading
Portable Solar Panels: Camping, Caravans, and Off-Grid
Portable solar panels for camping, caravans, motorhomes, and off-grid use in the UK. What to buy, how much power you'll get, and realistic expectations.
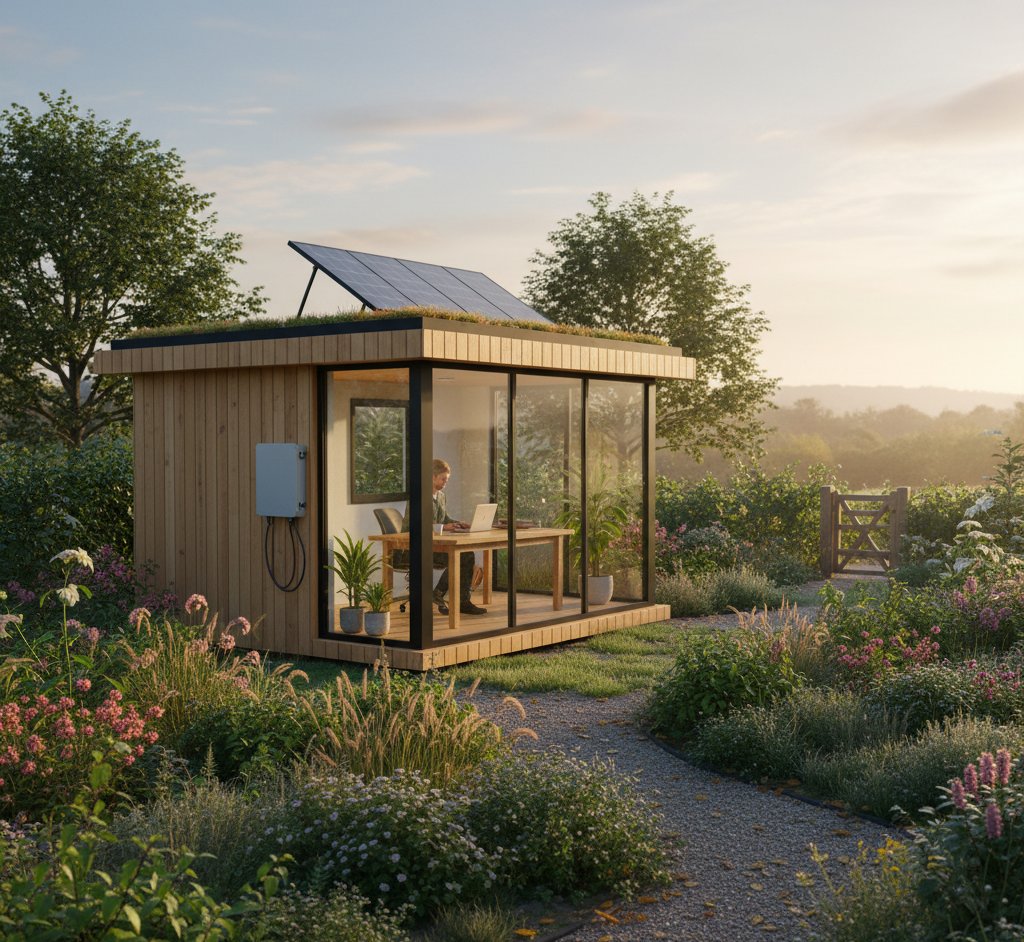
Solar for Sheds, Garden Offices and Summer Houses
How to power a shed, garden office, or summer house with solar. Off-grid sizing, common loads, plug-in kits vs proper installs, and planning permission guidance.
Balcony Solar Panels UK: A Practical Guide
Balcony solar panels for UK flats and apartments. What's possible, what's legal, how much they generate, and whether they're worth the investment in 2026.

Switch to Octopus Energy
Get 50 credit when you switch. We get 50 too — win-win.
What does this mean for YOUR home?
Design your perfect solar setup in under 3 minutes. Free, no sign-up required.
Build Your Solar System