This page contains affiliate links. If you purchase through them we may earn a small commission at no extra cost to you. Learn more
Solar Installation Day Checklist: What to Check Before You Sign Off
Installation day is the moment everything comes together — but it's also the day you have the most leverage. Once the scaffolding comes down and the installer leaves, fixing any problems becomes dramatically harder and more expensive. This checklist walks you through every stage of the day, from the first drill through the roof tile to the moment you hand over the final payment.
Before Installation Begins
The best time to catch problems is before any work starts. Take 20 minutes at the beginning of the day to run through these checks.
Verify certification
Ask to see evidence that your installer holds current MCS certification (or, if applicable, Flex-orb certification). MCS certification is required for your installation to qualify for the Smart Export Guarantee and for the MCS certificate you'll need later. Do not accept a printed business card or a website screenshot — ask to see the live MCS certificate or check the installer's registration yourself at mcscertified.com before they start.
Photograph everything before work starts
Take time-stamped photographs of your roof, the scaffold setup, and the interior of your loft space before any work begins. These images protect you if there's a later dispute about pre-existing damage — to the roof, the membrane, or the rafters.
Photograph More Than You Think You Need
Take photos from multiple angles: roof surface, each section of loft above the installation area, and any sections of ceiling or internal wall where cables will be routed. Video walkthrough of the loft is even better. Store these images in cloud storage immediately so they're timestamped and backed up.
Confirm the equipment matches your quote
Check that the panels, inverter, and batteries being unloaded from the van match what's specified in your quote — brand, model, and wattage. Some homeowners have had equipment swapped for lower-spec alternatives without being told. If you have a G99 approval from your DNO, the kit list on that approval must also match what's actually being installed. Swapping components without re-notifying the DNO is a compliance issue.
Confirm that all equipment is new and in good condition. Panels should arrive in sealed manufacturer packaging, and there should be no visible signs of previous use.
Check G99 approval if your system exceeds 3.6 kW
If the total inverter capacity exceeds 3.6 kW (roughly 3–4 typical panels' worth of inverter size), your installer must have received written G99 approval from your Distribution Network Operator before work begins — not just submitted the application. Ask to see this document. If work starts without G99 approval where it's required, the installation may not be compliant and you could face problems when applying for export payments later.
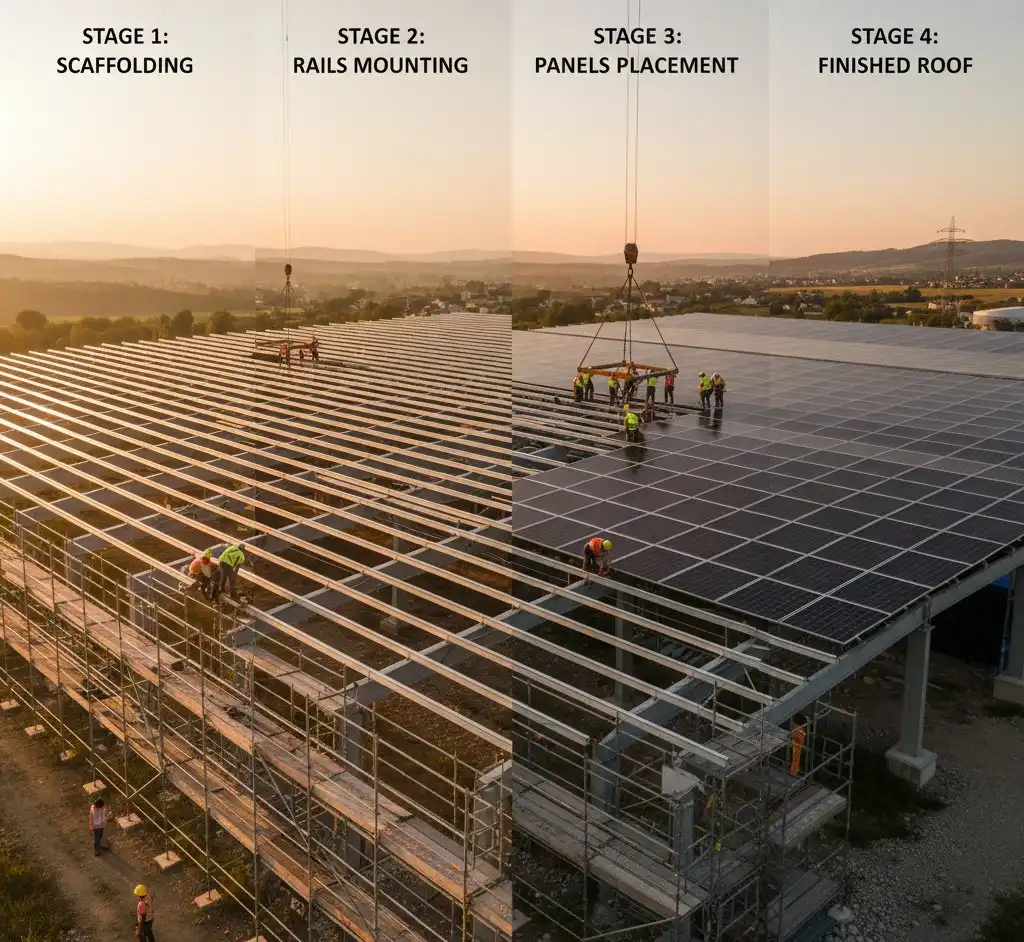
Roof Mounting Quality Checks
This is the section most homeowners are least equipped to assess, but it's arguably the most important. Poor roof mounting causes leaks, panel movement, and structural concerns that can persist for the 25-year life of your system.
Tile hooks must be correct for your roof type
Concrete tiles, clay tiles, and natural slates all require different hook designs. A hook designed for concrete tiles will not sit correctly under a slate, and vice versa. Ask your installer which hook type they're using and why it's appropriate for your roof material. If you're unsure, photograph the hook being installed and compare it to the manufacturer's installation guide — these are usually downloadable from the hook manufacturer's website.
Tiles must sit flat after hooks are fitted
After each tile hook is installed and the tile is replaced, the tile should sit flat and flush — not raised, rocked, or cracked. This is referenced explicitly in MCS MIS-3002 sections 5.9.1 and 5.9.8, the standard that governs how solar PV systems are installed in the UK. If you notice any tiles that look raised or out of alignment once the installer has moved along the row, point it out before the rails go on — it's far easier to correct at this stage.
Rails should be straight and panels level
Stand back and look at the rails once they're fitted. They should be straight and parallel with each other. Once panels are mounted, they should sit level with each other and aligned consistently across the array. A small amount of visual variation at the perimeter is normal, but any panel that sits noticeably higher, lower, or rotated compared to its neighbours is worth querying.
Inspect the loft space after brackets go in
If you can safely access your loft, do so after the roof brackets have been fitted. You're looking for two things:
- Screws in the rafters, not through them. The structural screws connecting the roof brackets should pass into the centre of the rafters. If you can see a screw that's missed the rafter or split the wood, the bracket is not properly supported and the tile above it may be at risk of movement.
- Roof membrane intact. The breathable membrane (the felt or modern synthetic layer under the tiles) should not be torn, punctured, or displaced. Damage here can allow driving rain or condensation to enter the roof structure over time.
Check for leaks on the first rainy day
Even a high-quality installation can have minor sealing issues that only become apparent when tested by rain. On the first rainy day after installation, check the loft space and any ceiling areas below the panels. Any new damp patches or drips should be reported to the installer immediately while the issue is still covered under their workmanship guarantee.
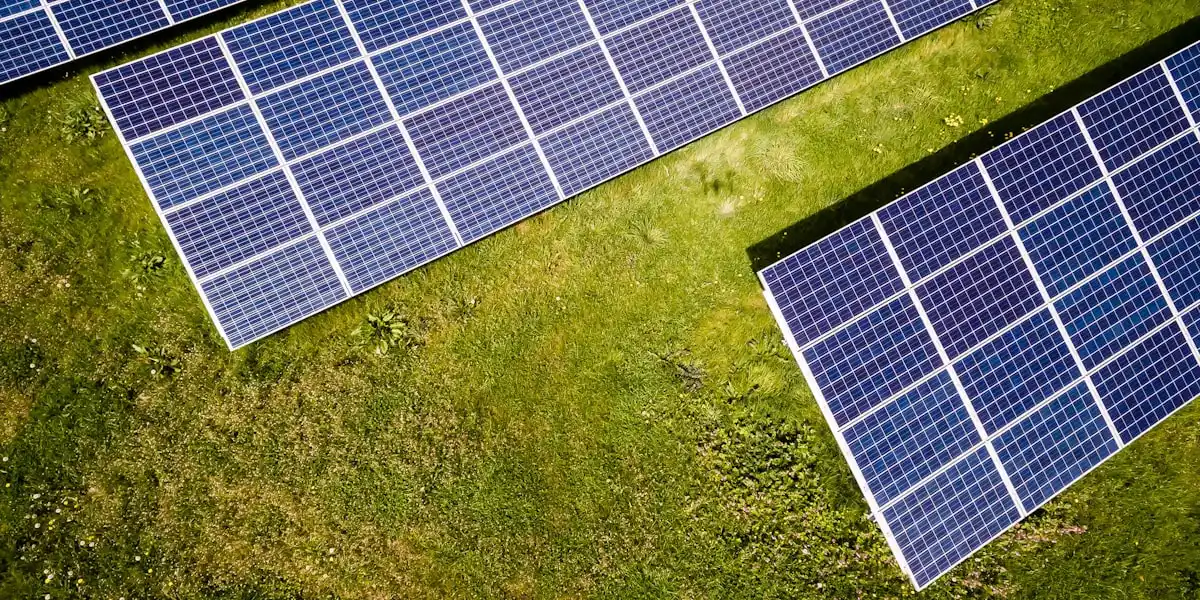
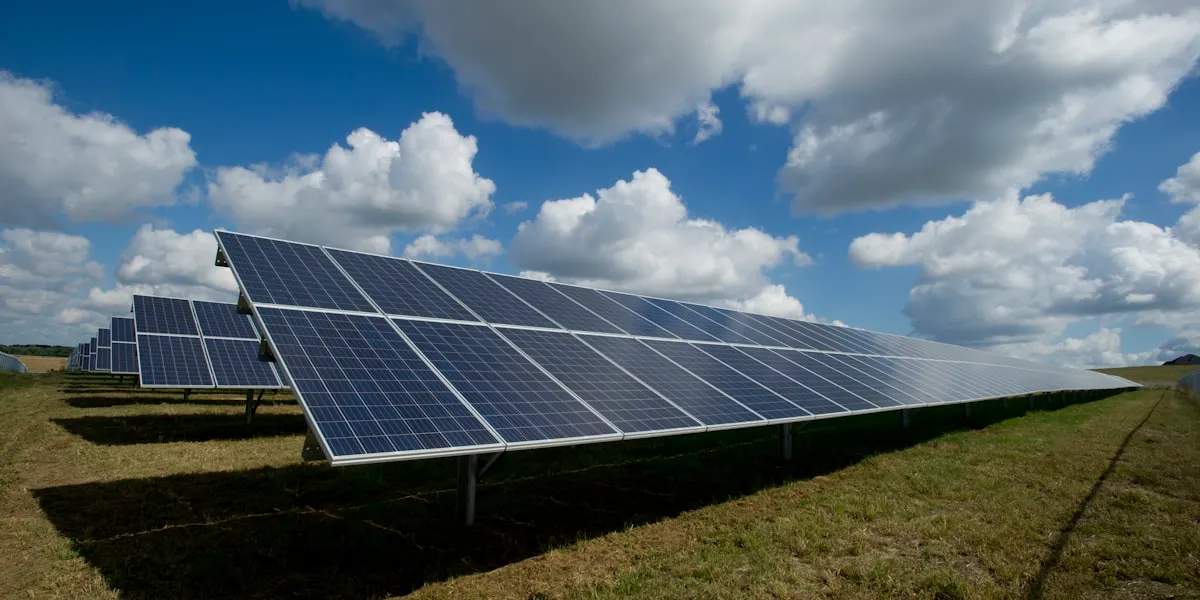
Ground Mount Checks
If you're having panels installed on a ground-mounted frame rather than the roof, these checks apply.
Confirm planning permission status before work starts
Ground-mounted solar arrays typically do not fall under permitted development rules in the same way as roof-mounted systems, particularly if they're large or in a visible location. Ask your installer to confirm the planning position before any groundwork begins. If planning permission was required and granted, check that the installation matches what was approved.
Row spacing matters more than you might expect
In winter, the sun's path is much lower in the sky. Panels mounted in rows that are spaced too closely will shade each other significantly during the winter months, reducing the generation you'd otherwise expect. Ask your installer to confirm the row spacing was designed around the winter sun angle for your latitude.
Consistent aspect, orientation, and pitch within each string
All panels connected in the same string (series string) should share the same orientation and pitch. Mixing a south-facing panel with a south-west-facing panel in the same string causes mismatch losses — the weaker panel pulls down the output of the whole string. If your ground mount has multiple strings, it's worth confirming how the panels are grouped.
Cable runs must be buried or protected
Any cabling running from a ground-mounted array back to the house should be buried underground or, at minimum, run inside armoured conduit. Exposed cables are a trip hazard, a target for mechanical damage, and a potential issue if animals gnaw through them.
Battery Installation Checks
Battery storage introduces additional safety and compliance considerations beyond solar panels alone. The relevant standard is PAS 63100:2024 — battery safety in dwellings.
Loft Battery Installations Are Now Prohibited
PAS 63100:2024, which took effect in April 2026, explicitly prohibits the installation of battery storage systems in loft spaces. This is due to the fire risk in a confined space with no direct escape route and extreme temperature variation. Any installer proposing a loft battery location is now non-compliant with both PAS 63100:2024 and BS 7671 Chapter 57. If your original quote specified a loft battery location, this should have been revised before installation day.
Heat and smoke alarms near the battery
If your battery is installed indoors — garage, utility room, or dedicated plant room — there should be working heat and smoke detectors in or immediately adjacent to the installation space. Keep a suitable fire extinguisher (CO2 or dry powder, not water) accessible nearby. Your installer should discuss this with you; if they don't raise it, raise it yourself.
EPS systems need their own dedicated earth
If your system includes an EPS (Emergency Power Supply) or UPS function — meaning it can power certain circuits if the grid goes down — the EPS output must have its own dedicated earth connection, separate from the standard grid connection. This is a safety requirement that must be signed off by a qualified electrician. Ask your installer to confirm this has been done as part of the Part P sign-off.
Location must be within temperature tolerances
Garages can fall below the minimum operating temperature for many lithium battery systems during cold UK winters. If your battery is going in a garage, ask your installer what the manufacturer's minimum operating temperature is and whether any insulation or heating provision has been factored in. A battery that enters a cold protection mode and stops charging or discharging is not doing its job.
Batteries must be properly racked — not stacked
Batteries should be mounted in a manufacturer-approved rack or on purpose-built stackable brackets. Simply placing battery units on top of each other without proper mounting is not acceptable and voids most warranties. Confirm that the racking arrangement follows the manufacturer's installation guide.
Maintain clearance and airflow
Most battery systems specify minimum clearance distances — from walls, from each other, and from other heat sources. Check that these clearances are maintained. Packed batteries with no airflow around them will run hotter and degrade faster.
General Workmanship Quality Checks
These checks apply regardless of whether you have panels only, or panels plus a battery.
Cable management
Panel wiring on the roof should be neatly routed along the rails and cable-tied at regular intervals. Loose cables that flap in the wind or rub against the underside of panels will degrade faster than cables that are properly secured. Inside the house, cables should run in trunking or conduit and be clearly labelled.
Bird-proofing mesh
If your quote includes bird-proofing mesh, confirm that it's attached using proper clip attachments that grip the panel frame — not screws driven through the roof tiles or into the roof membrane. Screwed-through-tile fixing is a water ingress route and damages the tile. See the bird proofing guide for more detail on what correct installation looks like.
Inverter mounting and clearance
The inverter should be mounted on a heatproof surface (not a timber plank or directly on a plasterboard wall without backing). There should be clear airflow around the unit — typically at least 100–150mm clearance on all sides, or as specified by the manufacturer. Inverters generate heat and need to dissipate it to operate efficiently and last their rated lifespan.
External cabling in conduit
Any cabling running on the outside of the building — typically between the roof entry point and where it passes through the wall — should be run inside UV-resistant conduit. Bare cables on an external wall are not weather-protected and will degrade over time.
Warning labels
All relevant components and circuits should be labelled. This includes the consumer unit circuits serving the solar system, the inverter, the battery (if fitted), and any isolator switches. These labels are a safety requirement under BS 7671 and a practical necessity for anyone who needs to isolate the system in an emergency.
Solar circuit on its own RCD
The solar and battery circuits should be on their own RCD (Residual Current Device) in the consumer unit, not sharing an RCD with other household circuits such as sockets or lighting. Sharing could cause nuisance tripping of unrelated circuits if there's an issue with the solar circuit.
Site left tidy
All packaging, offcuts, and waste should be removed before the installer leaves. Roof fixings and panel clips left in gutters or on the floor are a hazard. Any areas of grass or paving below the scaffold that have been covered or temporarily damaged should be restored.
Sealed penetrations
Wherever cabling passes through an external wall or roof — the point where cables enter from outside — the penetration must be sealed with an appropriate sealant or gland fitting to prevent water ingress and pest access. These entry points are a common source of both leaks and rodent entry if left open.
Commissioning Tests to Request
Before signing off the installation, ask the installer to run through these checks with you. A professional installer will expect this and should have already planned to complete most of them. If an installer is reluctant or dismissive, that is worth noting.
1. Kettle test Boil a kettle while watching the smart meter (or the monitoring app, if the system is fully configured). If there is sunshine or the batteries are charged, the meter should show very little or no import from the grid. This confirms the system is correctly connected and prioritising self-consumption.
2. Battery balance charge Batteries may draw a small amount from the grid when first commissioned, to balance the cells to an equal state of charge. This is normal behaviour and should complete within 24 hours. Confirm the installer has told you to expect this so it doesn't alarm you.
3. EV charger test If you have an EV charger installed as part of the same job, run a 10-minute charge session and then stop it. Confirm that no circuit breakers have tripped, and that the charger is prioritising solar generation rather than draining the battery unnecessarily.
4. EPS or UPS test If your system includes backup power capability, ask the installer to simulate a grid outage by briefly disconnecting the grid supply. Confirm that the circuits designated as backed-up — typically a subset of sockets or lighting — continue to operate. This test confirms that the EPS wiring and the dedicated earth have been correctly installed and configured.
5. App energy flow check Open the monitoring app and confirm that the energy flow diagram shows the correct direction of power: solar generation flowing to the home, with any surplus going to the battery and then to export. If the app shows reversed flows or missing legs (for example, the battery shows no activity when it should be charging), raise this before the installer leaves.
6. Smart meter export confirmation Ask the installer to confirm — on the smart meter display or the In-Home Display — that some export is being recorded. This confirms the system is correctly connected to the meter and that export data will flow through to any future SEG tariff application.
7. Battery solar charging With the sun out, confirm that the battery is actively charging from excess solar generation. This sounds obvious, but configuration errors can result in a battery that only charges from the grid and never from solar.
8. Off-peak charging configuration If you plan to use an overnight off-peak tariff to charge the battery cheaply, ask the installer to confirm that the off-peak charging schedule is correctly configured in the system settings. Verify the charge window times match your tariff's actual off-peak hours.
9. Generation comparison On the first full clear day after installation, compare the actual generation figure shown in the app against what you'd expect for that day based on your system size and the weather. Tools like Solcast or PVOutput can give you a rough benchmark. A large discrepancy on a clear day may indicate a wiring issue or an incorrectly configured inverter.
10. Generation graph check Look at the generation graph for the first full sunny day. It should follow a smooth bell curve, rising through the morning and falling through the afternoon. Unexplained dips — particularly sharp, repeated drops at the same generation level — can indicate overvoltage curtailment (the inverter throttling output because the local grid voltage is too high) or inverter overheating. Both are worth investigating with your installer if they appear regularly.
11. G99 export limit verification If your system is operating under a G99 approval that includes an export limit — for example, your DNO has capped your export at 3.68 kW — ask the installer to demonstrate that the export limiting function is active and correctly set. On a sunny day with a fully charged battery, the smart meter should show export capped at or below the approved limit.
Handover Documents Checklist
You should receive all of the following documents before the installer leaves, or with a clear written commitment to deliver any outstanding items within a specified timeframe. Do not make the final payment until you have, at minimum, the MCS certificate, the Part P certificate, and the IBG certificate.
Test Your App Credentials Before the Installer Leaves
This is the one that catches people out most often. Ask the installer to watch while you log into every app and portal using the credentials they've provided — inverter monitoring app, battery management portal, any manufacturer cloud account. If a password doesn't work or an account hasn't been created yet, the installer is still on site to fix it. Once they've packed up and driven away, resolving access issues can take days of back-and-forth with support teams.
After the Installer Leaves
Once the van has pulled away, there are a few actions to complete in the days and weeks that follow.
Register each product with its manufacturer
Manufacturer registration is separate from your MCS certificate. Most inverter and battery manufacturers require you to register the product on their own portal to activate the full warranty term. This is typically a 5–10 minute process per product. Check the operating manual or the manufacturer's website for the registration link. Missing this step can mean a shorter warranty period if you ever need to make a claim.
Notify your home insurer
Solar panels and battery storage are permanent fixtures that add value to your home and increase the cost of reinstatement in the event of a claim. Notify your home insurer that these have been installed. Most insurers will include them under standard buildings cover, but you need to tell them — failure to do so could affect a future claim.
Photograph the smart meter export reading
As soon as the system is commissioned, take a clear photograph of your smart meter showing the export reading. This creates a baseline from which your future SEG export payments will be calculated, and provides evidence of the start date for your export tariff application.
Apply for the Smart Export Guarantee
The Smart Export Guarantee (SEG) pays you for each unit of electricity you export to the grid. You apply through an electricity supplier — not through your installer or MCS. You'll need your MCS certificate number to apply. Rates and terms vary between suppliers, so it's worth comparing before committing. See the SEG guide for more detail on the application process.
Consider a time-of-use tariff if you have a battery
If you've installed battery storage, you may be able to reduce your bills further by switching to a time-of-use tariff that offers cheaper overnight electricity for charging the battery. The suitability depends on your battery capacity and your household's pattern of use. See the tariff comparison articles for more on which tariffs work well with battery storage.
Share this article
Smart home energy monitoring and automation — track your solar generation and control your home with Wi-Fi devices
Affiliate link — we may earn a small commission at no extra cost to you
Stay informed
Get free solar updates direct to your inbox
Related reading
The Solar Panel Installation Process: Step by Step
What happens during a solar panel installation from first quote to switch-on. A step-by-step guide to the UK solar installation process for homeowners.
What Happens After Solar Installation: The Commissioning, DNO, and SEG Timeline
Panels are on the roof — now what? From commissioning to your first SEG payment, including the DNO notification timeline nobody tells you about.
How to Choose a Solar Installer: Red Flags and Green Flags
How to choose a reliable solar panel installer in the UK. What to look for, what to avoid, essential questions to ask, and how to compare quotes properly.

Switch to Octopus Energy
Get 50 credit when you switch. We get 50 too — win-win.
What does this mean for YOUR home?
Design your perfect solar setup in under 3 minutes. Free, no sign-up required.
Build Your Solar System